|
robomatrix repositoryrobotics dataset ros2 robomaster vicuna embodied-ai llm vision-language-model llava |
|
|

|
robomatrix repositoryrobotics dataset ros2 robomaster vicuna embodied-ai llm vision-language-model llava |
|
|

|
robomatrix repositoryrobotics dataset ros2 robomaster vicuna embodied-ai llm vision-language-model llava |
|
|

|
robomatrix repositoryrobotics dataset ros2 robomaster vicuna embodied-ai llm vision-language-model llava |
|
|

|
robomatrix repositoryrobotics dataset ros2 robomaster vicuna embodied-ai llm vision-language-model llava robomaster_msgs robomaster_ros robomatrix_client robomatrix_interface robomatrix_server joystick_driver joystick_msgs |
|
|
Repository Summary
| Description | The Official Implementation of RoboMatrix |
| Checkout URI | https://github.com/waynemao/robomatrix.git |
| VCS Type | git |
| VCS Version | main |
| Last Updated | 2025-05-19 |
| Dev Status | UNMAINTAINED |
| CI status | No Continuous Integration |
| Released | UNRELEASED |
| Tags | robotics dataset ros2 robomaster vicuna embodied-ai llm vision-language-model llava |
| Contributing |
Help Wanted (0)
Good First Issues (0) Pull Requests to Review (0) |
Packages
| Name | Version |
|---|---|
| robomaster_msgs | 0.2.0 |
| robomaster_ros | 0.2.0 |
| robomatrix_client | 0.0.0 |
| robomatrix_interface | 1.0.0 |
| robomatrix_server | 0.0.0 |
| joystick_driver | 0.0.0 |
| joystick_msgs | 0.0.0 |
README

RoboMatrix: A Skill-centric Hierarchical Framework for Scalable Robot Task Planning and Execution in Open-World
📝Paper | 🌍Project Page | 🛢️Data

📰 Release
- [2025/01/08] 🔥 We release data collection method.
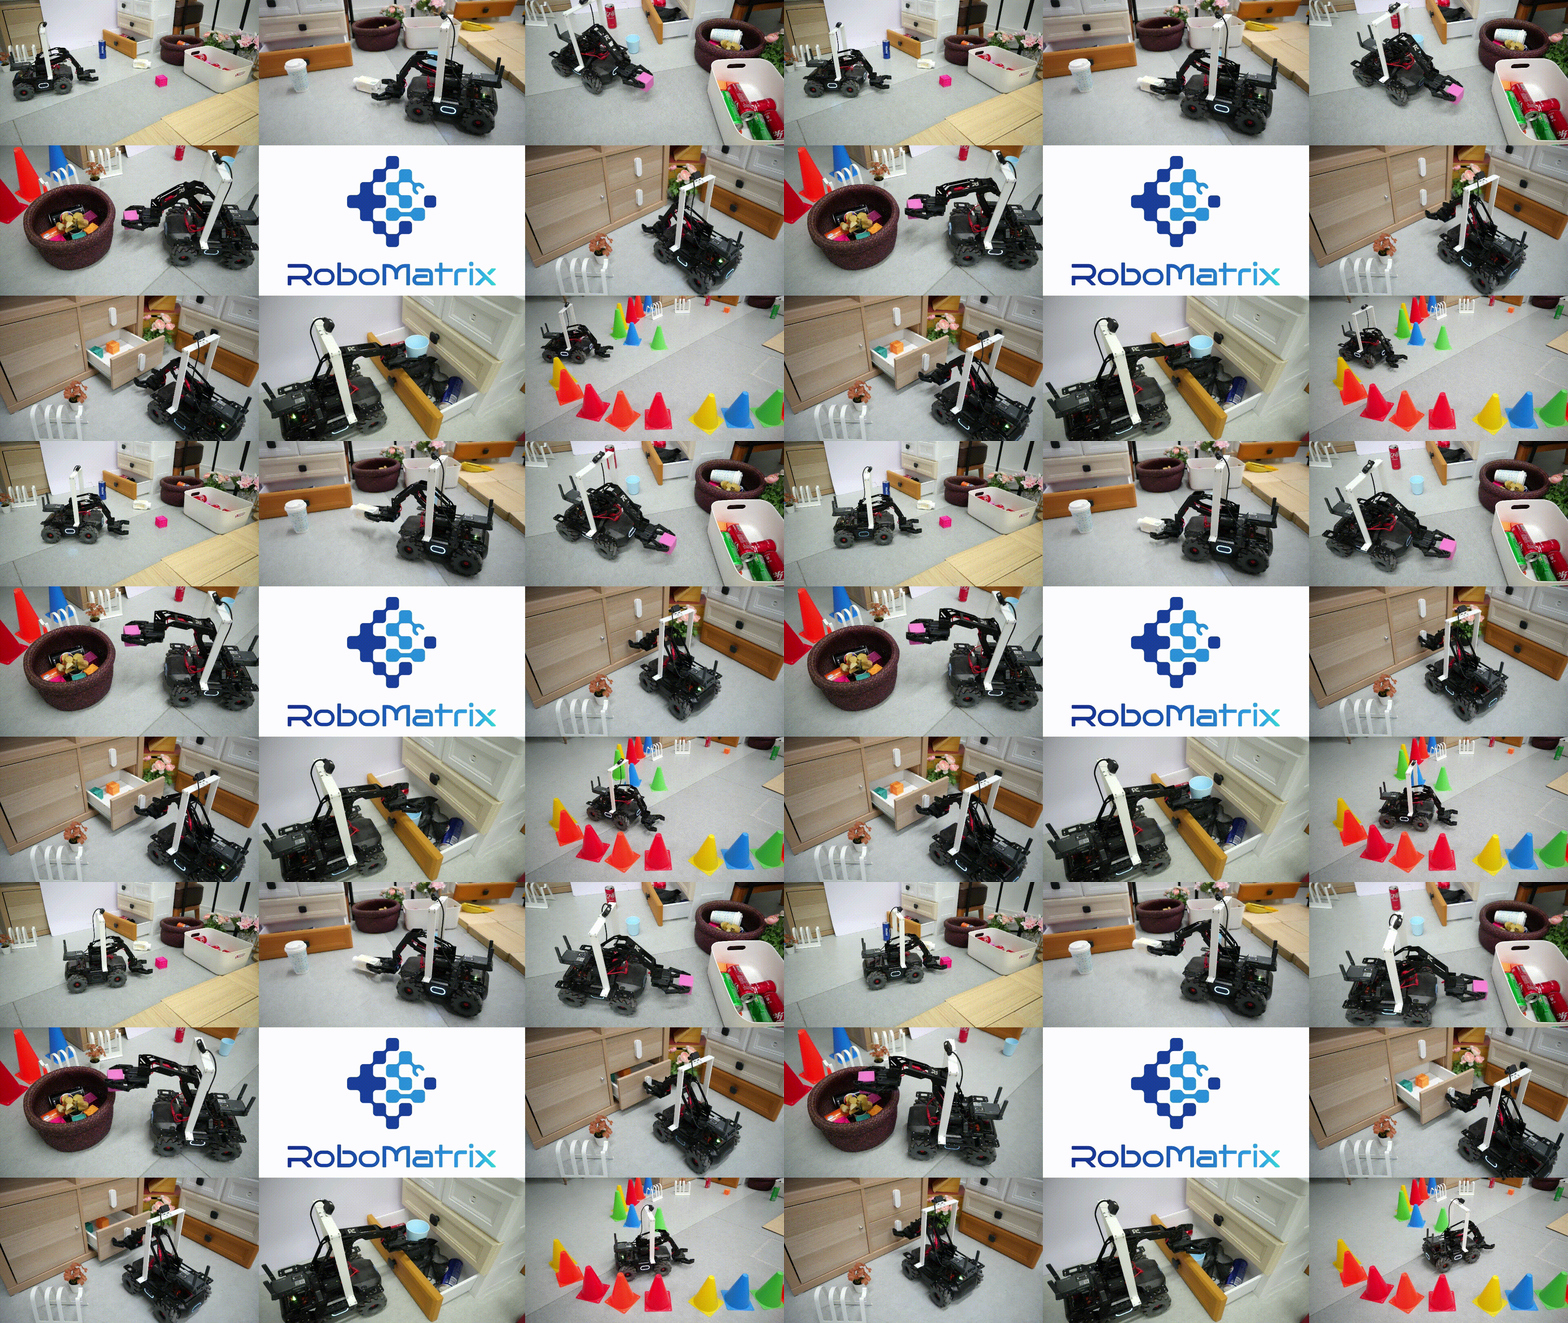
- [2024/12/04] 🔥 We release the RoboMatrix supervised fine-tuning (SFT) dataset containing 1,500 high-quality human-annotated demonstration videos.
Demos
Dynamic Adversarial Interaction
https://private-user-images.githubusercontent.com/35285052/392642975-b78e28aa-45c2-4bb0-9e70-b6a08c678f85.mp4
Hardware Preparation
We use robots from DJI’s RoboMaster series as the hardware platform, including the Engineering Robot (EP) and the Warrior Robot (S1). These two forms of robots share some common components, including the mobile chassis, monocular RGB camera, audio module, and controller. Additionally, each robot is equipped with a unique set of components to perform specific tasks, such as the target shooting capability of the S1 robot and the target grasping capability of the EP robot.
We modified the EP robot by mounting the camera above the robot to prevent the camera’s viewpoint from changing with the movement of the robotic arm. See 3D_Printing for the parts of the designed camera mount.
We use BEITONG ASURA 2PRO+ GAMEPAD NEARLINK VERSION as the controller for robot teleoperation.
Environment Configuration
We developed RoboMatrix using the ROS2 framework on Ubuntu 20.04. You can follow the official installation guidance to complete the installation of the Foxy distro of ROS2 and the necessary tools. In addition, we passed the test on Ubuntu 22.04 (ROS2 Humble), which may provide some reference for you if you want to install RoboMatrix in a later version of Ubuntu.
We provide a general installation procedure for ROS2, this might give you some help. If you already have it installed on your system, please skip this step.
ROS2 Installation
### Step 1: Set UTF-8 Open a terminal, check weather your system supports UTF-8. ```bash locale ``` If not support (no output in terminal), please install. ```bash sudo locale-gen en_US en_US.UTF-8 sudo update-locale LC_ALL=en_US.UTF-8 LANG=en_US.UTF-8 export LANG=en_US.UTF-8 ``` ### Step 2: Set Ubuntu Universe Open a terminal, check weather your system supports Ubuntu Universe. ```bash apt-cache policy | grep universe ``` If not support (no output in terminal), please install. ```bash sudo apt install software-properties-common sudo add-apt-repository universe ``` ### Step 3: Add ROS2 software source and key ```bash sudo apt update && sudo apt install curl gnupg2 lsb-release sudo curl -sSL https://raw.githubusercontent.com/ros/rosdistro/master/ros.key -o /usr/share/keyrings/ros-archive-keyring.gpg echo "deb [arch=$(dpkg --print-architecture) signed-by=/usr/share/keyrings/ros-archive-keyring.gpg] http://packages.ros.org/ros2/ubuntu $(lsb_release -cs) main" | sudo tee /etc/apt/sources.list.d/ros2.list > /dev/null ``` ### Step 4: Get ROS2 Install the specified version of ROS2, using **Foxy** as an example. ```bash sudo apt update sudo apt install ros-foxy-desktop ``` ### Step 5: Source bash ```bash echo "source /opt/ros/foxy/setup.bash" >> ~/.bashrc source .bashrc ``` ### Step 6: Test demo Open a terminal, start talker node. ```bash ros2 run demo_nodes_cpp talker ``` Open a new terminal, start listener node. ```bash ros2 run demo_nodes_cpp listener ``` ### Step 7: Install colcon ```bash sudo apt install python3-colcon-common-extensions ```🛠️ Installation
Build workspace
git clone https://github.com/WayneMao/RoboMatrix.git
cd ~/RoboMatrix && colcon build
RoboMaster SDK
Install dependencies.
sudo apt install libopus-dev python3-pip
python3 -m pip install -U numpy numpy-quaternion pyyaml
Install SDK from source code.
python3 -m pip install git+https://github.com/jeguzzi/RoboMaster-SDK.git
python3 -m pip install git+https://github.com/jeguzzi/RoboMaster-SDK.git#"egg=libmedia_codec&subdirectory=lib/libmedia_codec"
Dependencies
pip install -r requirements.txt
pip install torch==2.0.1 torchvision==0.15.2 torchaudio==2.0.2 --index-url https://download.pytorch.org/whl/cu118
Grounding-DINO-1.5-API
cd ~/RoboMatrix/robomatrix_client/robomatrix_client
git clone https://github.com/IDEA-Research/Grounding-DINO-1.5-API.git
cd Grounding-DINO-1.5-API
pip install -v -e .
Data Collection
Download the RoboMaster official APP, follow the instructions to connect the robot to WiFi (only WiFi5), and connect the computer to the same WiFi to complete the connection.
Step 1: Start launch file
source ~/RoboMatrixinstall/setup.bash
ros2 launch robomaster_ros collect_data.launch.py name:=example idx:=1 dir:=~/RoboMatrixDatasets
NOTEs
- Make sure the robot is successfully connected to the specified WIFI before launching the launch file.
- Make sure the controller’s button mode is XBOX, which you can view in the terminal. In the case of BEITONG, long press the
POWERbutton to switch. - Ensure that the robot initialization is complete before proceeding with the following operations.
Step 2: Start collecting
By pressing the START button, the robot’s status begins to be recorded and the other buttons on the handle are activated, allowing control of the robot’s movement.
Step 3: Control the robot
The control mode of the robot chassis is speed control. The RS axis controls the translation speed of the chassis, and the LT and RT axes control the rotation speed of the chassis.
The control mode of the robot arm is position control. The HAT key set changes the position of the end of the robot arm in the plane. Each press moves its position a fixed distance in the specified direction.
The gripper control is binarized. The A button controls the gripper open to the maximum, and the B button controls the gripper closed to the maximum.
Step 4: Save data
Press the BACK button to save the data, then press the POWER button to clean the ROS2 node and wait for the video to finish saving.
Dataset Construction
Comming soon.
Task Execution
Comming soon.
TODOs
- Package Docker
- 🤗 Release Supervised Fine-tuning dataset
- Optimize VLA ROS communication
- Open source VLA Skill model code
- Release VLA Skill model weights
- Open source Shooting code
Citation
If you find our work helpful, please cite us:
@article{mao2024robomatrix,
  title={Robomatrix: A skill-centric hierarchical framework for scalable robot task planning and execution in open-world},
  author={Mao, Weixin and Zhong, Weiheng and Jiang, Zhou and Fang, Dong and Zhang, Zhongyue and Lan, Zihan and Li, Haosheng and Jia, Fan and Wang, Tiancai and Fan, Haoqiang and others},
  journal={arXiv preprint arXiv:2412.00171},
  year={2024}
}
招聘
具身智能-具身大模型算法研究实习生 职位描述
职位描述
- 参与多模态理解与生成大模型、VLA大模型所需的数据清洗和自动标注系统开发,确保各类型/模态数据的质量与多样性;
- 探索高效的数据增强和数据合成方法,例如图像/视频编辑;
- 对机器人平台实现算法的部署和调试,提高机器人策略效率;
- 对前沿具身算法进行研究探索,包括不限于VLA、RDT、Pi0等;
- 我们提供有力的研究指导,进行论文发表; 职位要求 1、实习时间至少6个月,每周保证4天以上实习 2、硕士及以上学历在读,计算机、自动化等相关专业优先; 3、具备较强的软件工程能力,熟练使用Python、pytorch,熟悉Linux操作系统; 4、熟悉并行化编程,熟悉三维坐标变换、计算机视觉基础知识,了解机器人运动学; 5、有较好的英文科技文献阅读及算法复现的能力; 6、有实际的机器人开发经验优先,有大规模数据生成与处理经验优先;
工作地点:北京·中关村,逐际动力北京实验室
申请方式:请将你的简历以及相关项目/研究的介绍发送至 waynemao@limxdynamics.com ,简历格式:实习_姓名_学校_方向.pdf
PS. 同时也招收物理仿真实习生,视频生成/世界模型实习生,运动控制实习生, 还有少量全职HC。
PPS. 请简历优先投递邮箱,走内推通道
Acknowledgments
- Implementation of Vision-Language-Action (VLA) skill model is based on LLaVA.
- RoboMatrix-ROS is based on official RoboMaster-SDK, modified RoboMaster-SDK and ROS2.
- Some additional libraries: Grounding-DINO-1.5, YOLO-World.

CONTRIBUTING

|
robomatrix repositoryrobotics dataset ros2 robomaster vicuna embodied-ai llm vision-language-model llava |
|
|

|
robomatrix repositoryrobotics dataset ros2 robomaster vicuna embodied-ai llm vision-language-model llava |
|
|

|
robomatrix repositoryrobotics dataset ros2 robomaster vicuna embodied-ai llm vision-language-model llava |
|
|

|
robomatrix repositoryrobotics dataset ros2 robomaster vicuna embodied-ai llm vision-language-model llava |
|
|