Package Summary
| Tags | No category tags. |
| Version | 0.1.0 |
| License | BSD-3-Clause |
| Build type | CATKIN |
| Use | RECOMMENDED |
Repository Summary
| Checkout URI | https://github.com/EduArt-Robotik/iotbot.git |
| VCS Type | git |
| VCS Version | main |
| Last Updated | 2023-05-23 |
| Dev Status | MAINTAINED |
| CI status | Continuous Integration : 0 / 0 |
| Released | UNRELEASED |
| Tags | No category tags. |
| Contributing |
Help Wanted (0)
Good First Issues (0) Pull Requests to Review (0) |
Package Description
Additional Links
Maintainers
- EduArt Robotik
Authors
- Stefan May (EduArt Robotik)
iotbot
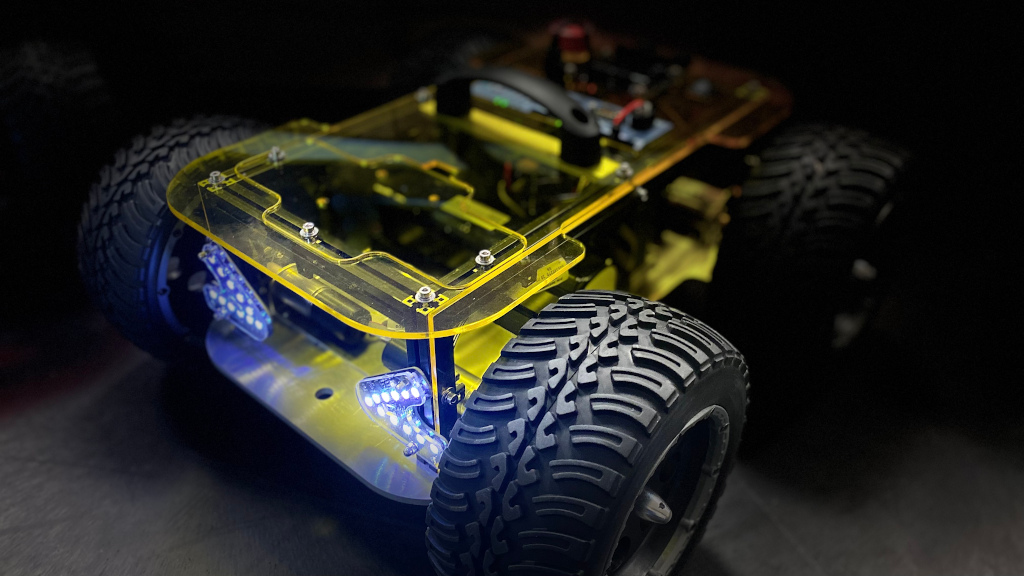
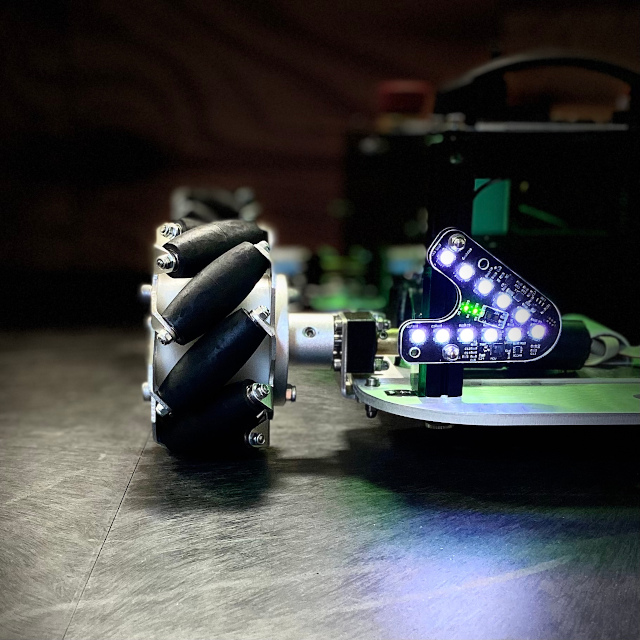
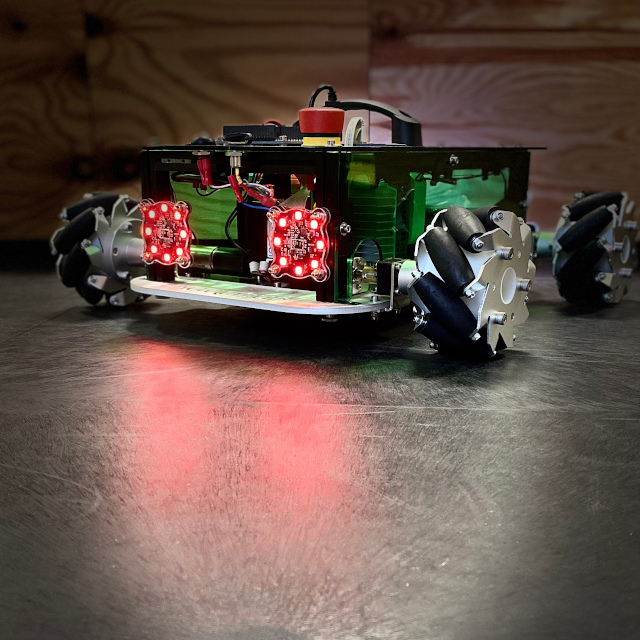
This package comprises a ROS interface for EduArt’s Eduard-Plattform, aka IOTbot. It includes two kinematic concepts: Mecanum steering and skid steering. Both can be used in dependency of the mounted wheels.
Installation on IOT2050 Devices with Debian Buster from Scratch
apt update
apt upgrade
reboot
sudo sh -c 'echo "deb http://packages.ros.org/ros/ubuntu buster main" > /etc/apt/sources.list.d/ros-latest.list'
apt-key adv --keyserver 'hkp://keyserver.ubuntu.com:80' --recv-key C1CF6E31E6BADE8868B172B4F42ED6FBAB17C654
apt update
apt install ros-noetic-ros-base ros-noetic-joy git
echo "source /opt/ros/noetic/setup.bash" >> ~/.bashrc
source /opt/ros/noetic/setup.bash
mkdir -p catkin_ws/src
cd catkin_ws/src/
catkin_init_workspace
git clone https://github.com/eduart-robotik/iotbot.git
cd ..
catkin_make
Additionally, the UART interface needs to be configured with
iot2050setup
Configure I/O to use UART RX & TX pins. Reboot the device:
reboot
Launching the Robot
In order to run the robot, you need to launch the appropriate launch file. In the launch folder, there are four prepared templates. Choose the right kinematic concept and the right motor variant (basic or performance).
roslaunch iotbot skid_performance.launch
When everthing is initialized well, one should see the following output:
[ WARN] [1628772862.880453339]: Lag detected ... deactivate motor control
This is not a bug, but a feature, since the robot will stop immediately, if no frequent communication with a controlling node is established.
Please notice also, that the ROS variables ROS_MASTER_URI and ROS_IP should be set properly. If you have a changing IP-address of the robot, you might consider to use the following bash code in your ~/.bashrc:
MYIP=`hostname -I | awk '{print $1}'`
export ROS_MASTER_URI=http://${MYIP}:11311
export ROS_IP=${MYIP}
Steering with Joystick Extreme 3D Pro
Install the ROS joy interface on your host machine, if you have an Extreme 3D Pro.
sudo apt install ros-noetic-joy
After installation, ensure to have configured the ROS communication well:
export ROS_MASTER_URI=http://<IP_OF_IOTBOT>:11311
export ROS_IP=<HOST_IP>
Finally, launch the joy node as follows:
rosrun joy joy_node _autorepeat_rate:=10
The output of warnings on the IOT2050 device should stop and the IOTbot can be steered. Please find the button and axis mapping of the joystick below:
| Button | Function |
|---|---|
| F1 | Beam light |
| F2 | Warning light |
| F3 | Flash left |
| F4 | Flash right |
| F5 | Rotational light |
| F6 | Running light |
| F11 | Enable robot |
Important: The robot must be enabled, before it will move!
| Axis | Function |
|---|---|
| y (0) | Move left/right |
| x (1) | Move for-/backward |
| z (2) | Turn left/right |
| 3 | Throttle |
Steering with Keyboard
For the IOTbot, a minimalistic GUI is provided, that enables the steering with the keyboard. For installation and usage, please visit the following repository: https://github.com/eduart-robotik/edu_virtual_joy.git
Quick Start Guide for pre-installed Systems
1) Switch on robot and connect to the wireless network (pre-installed systems have the SSID “Eduard_{Color}”). 2) The default IP adress of the robot is 192.168.0.100. Check the IP of your system with
ip addr
and set the appropriate environment variables, e.g.:
export ROS_IP=192.168.0.200; export ROS_MASTER_URI=https://192.168.0.100:11311
3) Then connect to your robot with a second terminal:
ssh root@192.168.0.100
The default password is “root”. Please change the password at your first login. Consider also to add your own user as sudoer and disable the login for the root account.
4) The robot can be activated with a ROS launch script. It is recommended to start a rosmaster service beforehand:
roscore &
Depending on the wheels mounted, start the corresponding script, e.g.:
roslaunch iotbot skid_performance.launch
for robots having performance drives and off-road tires mounted. Other options are mecanum_performance.launch for mounted mecanum wheels or skid.launch and mecanum.launch for the low-cost drives.
5) Now go back to the terminal, where you have set the ROS environment variables and launch the virtual joystick node:
python3 src/edu_virtual_joy/scripts/edu_virtual_joy_node.py
See the documentation of the virtual joystick for installation instructions and more features: https://github.com/eduart-robotik/edu_virtual_joy.git
Conditions to move the Robot
1) The emergency stop button is not pressed.
2) The charging cable is not connected.
3) The drive has been activated (enable command).
Important: The robot has an undervoltage detection. If the battery voltage permanently drops below 17.5V, the robot flashes a red warning signal. Now the robot should be connected to a charging cable as soon as possible. If this does not happen, the system will automatically shut down after 120s.
Electrical Interface
IOT2050 extension shield
The following graphic gives an overview of the electrical interfaces of the IOT2050 expansion shield. You can also see the attached DCDC converter shield, which makes it possible to supply additional devices with a constant voltage.
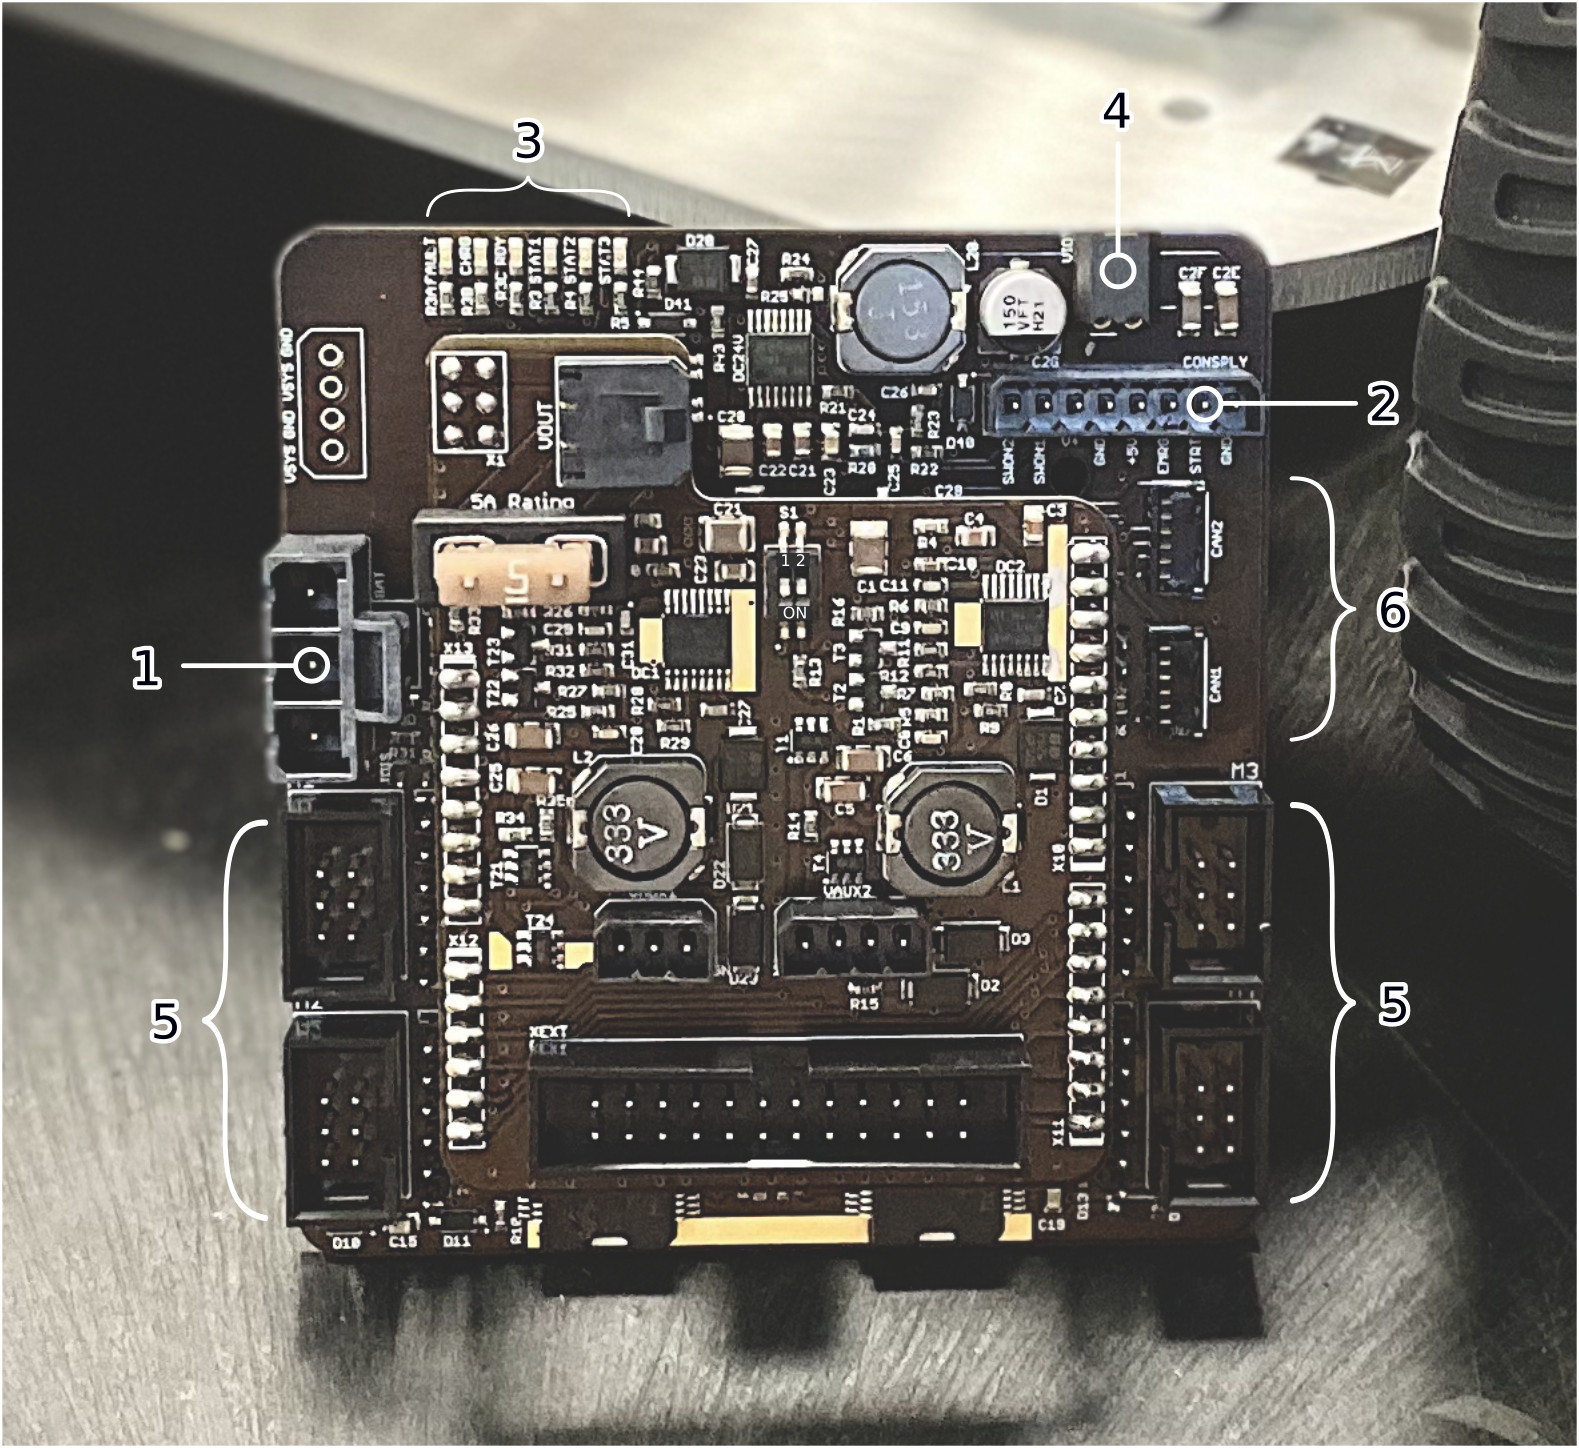
| # | Description |
|---|---|
| 1 | Battery socket: Connect only batteries specified by EduArt (19,2V NiMH, 6.8kOhm NTC). |
| 2 | Control line socket: 8-pin socket to connect charger, stop button, on/off switch and start button. |
| 3 | Status LEDs: Visualization of the following statuses: Charge status, Stop button pressed, Enable status of the motors, General error. |
| 4 | IOT2050 supply socket: Output socket for supplying the IOT2050. |
| 5 | Motor sockets: Two different sockets supporting the connectors of 37D metal gear motors from Pololu and the 2232 series of Faulhaber. |
| 6 | CAN sockets for lighting system: CAN1 is for the left side and CAN2 for the right side of the lighting system. |
Please finde below a description of the individual sockets.
1) Battery socket
The battery socket is suitable for the battery supplied by EduArt. Do not connect any other battery, as the charge controller is only designed for this battery type.
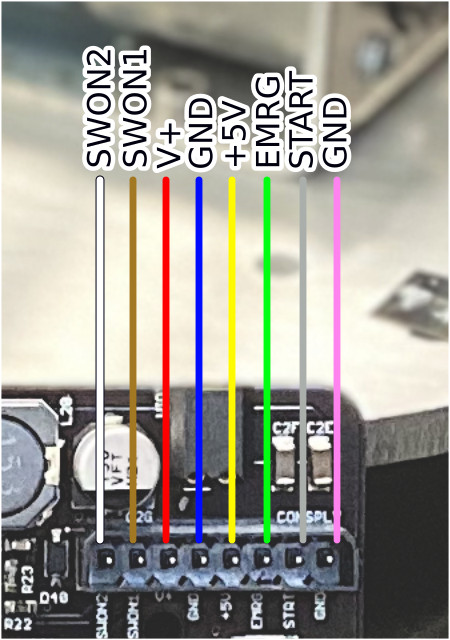
2) Control line socket
The 8-pin socket for the control lines enables the connection of the following components.
| Component | Description |
| —— |:–|
| On/Off switch | Connect the switch between the SWON1 and SWON2 contacts. The on-state is when you short-circuit both contacts. |
| External power supply | An external power supply must be between 27V and 30V and capable of supplying a current of 3A. Connect the positive pole of the power supply output to the contact labeled V+ and the power supply ground to GND.. |
| Stopp push button | Connect a normally closed pushbutton to the +5V and EMRG contacts. If the button is not pressed, these contacts are short-circuited. The drives are then activated. Pressing this button only deactivates the motor control. The supply voltages for the peripheral devices are still provided..|
| Start button | Connect a non-latching pushbutton to the START and GND contacts. A short pulse signals a switch-on command to the IOT2050 expansion shield.. |
3) Status LEDs
| # | Description | | —— |:–| | FAULT | Charger in fault state. | | CHRG | Charging process in progress. | | RDY | Chager ready for operation.| | STAT1 | Status 1: Stopp button state. This LED lights up when the stop button is not engaged. | | STAT2 | Status 2: Drive readiness state. This LED lights up when the drives are enabled and ready for control. | | STAT3 | Status 3: General error. This LED lights up when unforeseen errors occur. |
4) IOT2050 supply socket
The IOT2050 expansion board provides a supply output for the IOT2050 gateway. The output voltage is limited to 21.6V. When the power supply is not connected, the output voltage is at maximum the battery voltage. This output voltage can be used as supply voltage for the IOT2050 gateway by means of a wire jumper.

5) Motor sockets
Shown below is the connection of four 37D metal gear motors from Pololu. Be careful not to connect the connectors the wrong way round. Reversing the polarity of these connections would destroy encoder electronics and in the worst case even the IOT2050 expansion board.
As an alternative, high-quality motors from Faulhaber (type 2232) can be connected with a standard ribbon cable. These motor connections are protected against polarity reversal, but these motors are significantly more expensive.
Do not connect two motors to one channel! Either use the Pololu header or the Faulhaber header.

6) CAN sockets for lighting system
These connectors allow to connect the sensor-integrated lighting system from EduArt. The socket labeled CAN1 connects the left strand of the bus system. CAN2 connects the right strand.
DCDC converter shield
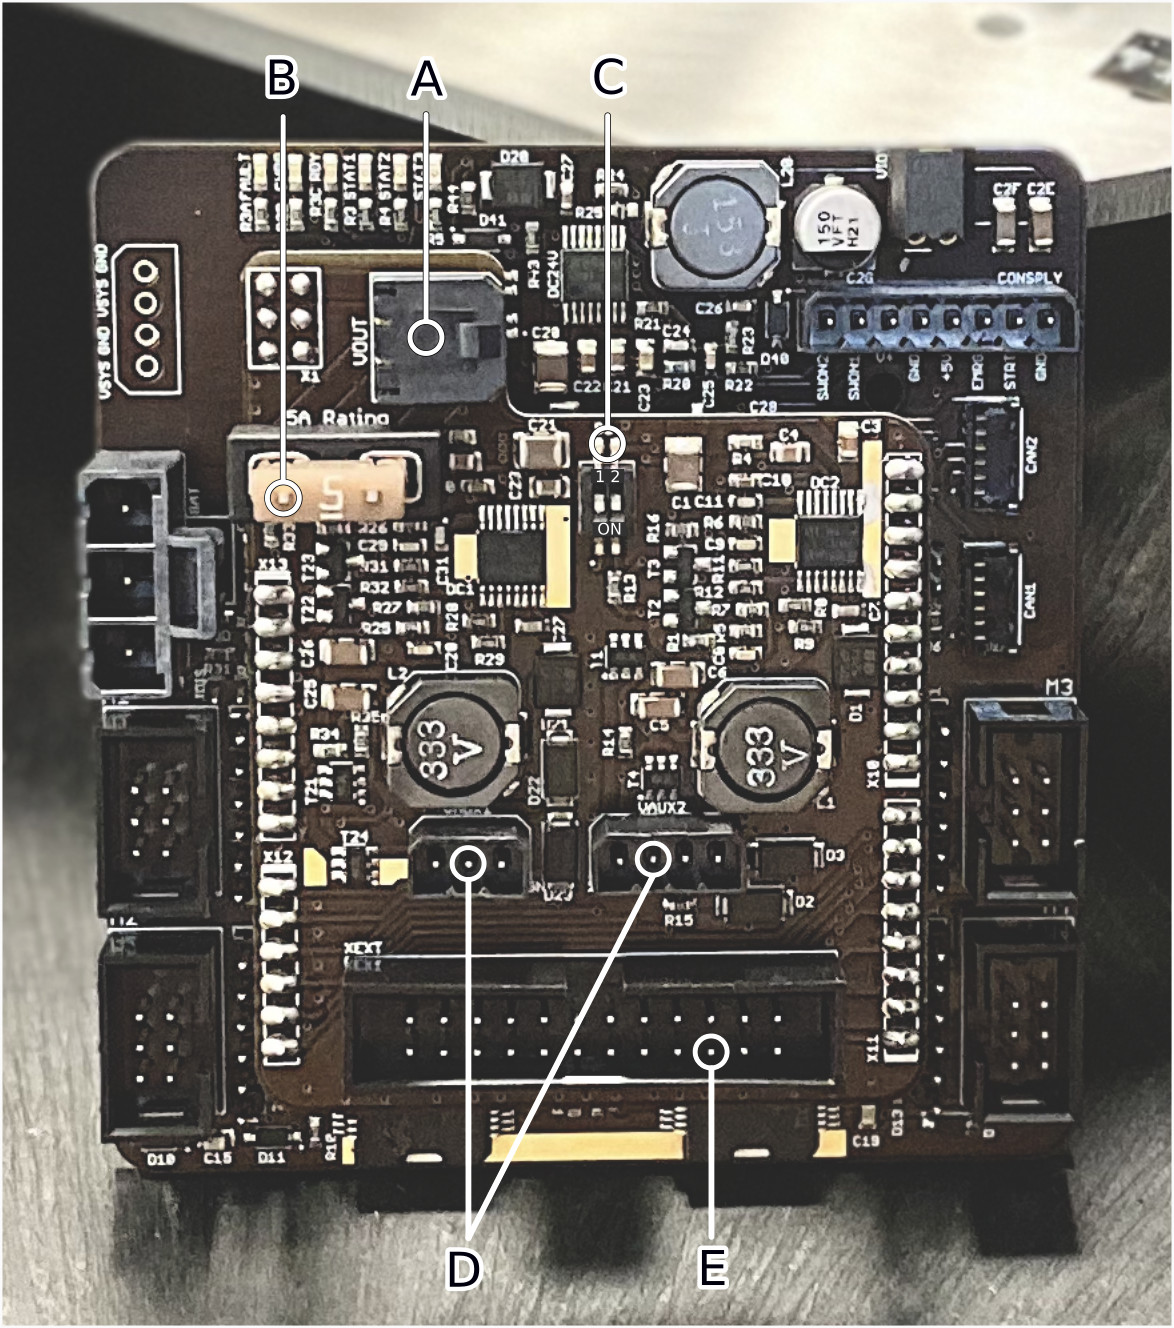
| # | Description |
|---|---|
| A | Power output socket: This sockets provides the system voltage to external components. The voltage varies between 17.5V and 30V. Make sure that devices that are supplied via this socket can also withstand the specified voltage range. Connect the power line for the adapter shield to this socket. |
| B | 5A fuse for power output socket. |
| C | Dip switch for switching the voltage levels of the auxiliary power supply. The on position switches to the respective higher voltage. |
| D | Auxiliary power supply. VAUX1: 12V or 5V, VAUX2 19V or 12V. |
| E | Flat ribbon cable jack for the Arduino compatible expansion board. |
Wiki Tutorials
Package Dependencies
| Deps | Name |
|---|---|
| geometry_msgs | |
| joy | |
| roscpp | |
| sensor_msgs | |
| std_srvs | |
| catkin |
